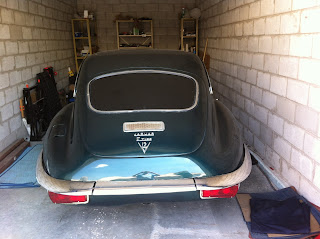
Thursday 30 March 2017

First Post of 2017 - Door Locks & Transmission

I've been very poor at keeping this blog alive, although I haven't done much on the car at all over the winter months.  Now that Spring seems to be coming, hopefully I'll get round to doing more work and updating the blog.

An update, for the record, on a few things that have been going on with the car recently:

I read somewhere a couple of months ago that it is possible to get certificates of original factory records for Jaguar cars, so I contacted Jaguar Heritage Trust and was able to get the certificate for my car.  It turns out that it was originally built in 1972, not 1973, as I had first thought - that was the registration year.  Original distributor was British Leyland, Canada, and was originally dispatched from the factory in January 1973.  The certificate has the numbers for the chassis, engine, body and gearbox, so, as I get further into the car, I can verify that each of these components is original.  Good information to have, and a nice looking certificate to contain it!

I think I mentioned in an earlier post that I had bought new barrels for the door locks.  I had the drivers side handle and lock off and disassembled, but couldn't put it back together with the new barrel so that it would work.
Door lock assembly that fits into the handle.
It's the small plunger sticking out of the left-hand part that I can't get to seat correctly to lock the door.
I thought there may be a part missing, but when I too the passenger-side handle and lock off, I found it to be the same assembly and all parts agreed.  The passenger-side was working.  I've finally decided that is has to be wear in the plunger in the lock that's not allowing it to seat properly in the locked position, so I bit the bullet and bought a pair of complete handle/lock assemblies and have fitted those.  That's allowed me to put back the door cards and the window trim, giving me a bit of space back in the garage, and visually complete doors (although there's more internal work that I'll need to do in the future).  Both locks work fine.

The other thing that's been on my mind with the car recently is a problem I'm having with the gearbox (auto transmission).  A month or so ago I was driving the car around the storage area where I keep it.    With no warning, I lost the drive, with a noise (didn't sound catastrophic, but it was there), and the engine revs increased significantly (not as far as redline).
Trying different selector positions, I found that reverse still worked fine.  For another few feet, I still had some drive in position 2 on the selector, but then that stopped aswell.
I got the car back into the garage in reverse, with no further issues.
Since then, because I still had motion in reverse, I've been slowly adding transmission fluid to the 'box, 1/2 pint at a time.  So far I've added 2 pints (capacity is 16 pints).
When checking for any progress today, once the car was warmed up, I still have reverse but can only get a creep forward in drive.  However, positions 1 & 2 on the selector both give me "normal" positive forward motion (position 2 had stopped originally!).
Reading through the fault diagnosis section of my repair manual, the only check that it suggests for no forward drive in D, other than those suggested for the other selector positions is to check the rear band adjustment.  I can't find any detail about how to check this in the manual, so assume it's a transmission strip-down check.
Having got drive back in selector positions 1 & 2, I'm tempted to continue topping up the fluid, but I don't want to run the risk of over-filling the 'box, although it is vented through the dipstick/filler tube, so worst case I would only expect it to spit fluid back up through that.
I'll go back early next week, when the weather is a bit warmer again, maybe add another 1/2 pint of ATF and see if it revives Drive.

For a while now I've been planning on putting the E-type into a shop to get the sill(s) replaced and other work that I can't do, to get the car into road-worthy condition so that I can drive it around this summer.  There are a couple of places I've been considering.  One does mechanical work on classic cars, although focuses mainly on MGs.  Another is widely known because of TV advertising, and they seem to have done a lot on all types of classics.  I'd pretty much decided on going with this latter one, until yesterday evening when I was talking to a friend who had taken his classic Corvette there.  He had nothing good to say about this place, having had trouble with payments for the work done, as well as the quality of the parts they used.  So that put me off going there.  So I checked out the Ontario Jag Owners Assoc website, and found another classic restorer, not too far from here (which I like, so I can visit regularly while they have the car).  I called them and have set up to go to visit them some time next week to check out their premises as well as discuss the work and phasing I'd like to consider having them undertake.  Glad I've found a potential "restorer" and maintenance place - hopefully we can make something work.

Friday 18 November 2016

November Update

I was trying to keep my entries chronological, but it's so long between posts that I'll write about what I've most recently worked on, and fill in the gaps later (eg, I'll get back to fitting the exhaust later).  However, if you want to know if I've worked on anything that's not in a post, please ask.

So today I've replaced one of the radiator hoses.  I think I described in an earlier post how I had dumped all the engine coolant when a hose came off a stub pipe that wasn't connected properly.  I fixed it at the time, but the same thing happened again a couple of weeks ago.  This time it looked like the end of one of the rubber hoses had perished.  However, I tried to put it together again.  Unfortunately, I used a small amount of oil on the stub pipe to try to get it further onto the hose, but although I tightened the clip as tight as I could, it easily came apart again, dumping another volume of coolant down the drain.

This time, I decided to look more closely at these problem hoses, identifying them properly through my workshop manual and SNG Barrett's parts manual.  It turns out that it should only be a single hose from the water pump to the oil cooler - whoever had put the car together before I got it must have had problems with the hose, split it in two, and found an appropriate diameter steel pipe to make a connection stub from.  Having worked this out, I ordered the correct hose from SNG, and it arrived within a couple of weeks.  The old 2-piece hose and the new correct hose are shown together in the photo below:
New water pump / oil cooler hose, compared to 2-part hose that had been cobbled together.

The bottom part of the old hose came off OK, since I'd had it off a couple of times before.  I was a bit worried that I'd have trouble with the upper part, attached to the outlet from the water pump as it didn't appear to have been touched in a long time, and access to it was a bit restricted.  Earlier this week I sprayed the hose clip with release oil, so that loosened easily.  The hose was quite tight on the pipe, but with manipulation, it came off relatively easily.

Putting the new hose on was a simple job, so now I'm a lot more confident about my cooling system. I topped up the coolant and ran the car round until the engine was fully warm - in fact, the gauge only just got into the "normal" lettering, which is the lowest I've had it.  This may have been helped by improved flow through the new hose, as the old hose was flattened on the bend.

This is the second improvement I've had in the cooling temperature.  When I first started running the car, the temperature gauge would rise all the way to the hot end of the scale.  I had heard that old gauges could sometimes read high, and as the engine had never actually overheated (dangerous logic, I know!) I continued to run the car, although not for long after it had reached high temperature.  Having said all this, I still looked for "easy" ways of trying to get the gauge to read properly.  I decided I might as well replace the thermostats, so bought two 74C rated 'stats from SNG.
One of the original thermostats that I replaced with a new one from SNG Barrett.
Physically, there doesn't seem to be any difference between the old and the new.  I still need to test the two old ones that I took out.

Since I have done that, the temperature gauge has never gone back to full scale, and while the car is moving, it now stays at the low end of the "normal" lettering.  A nice success.

The other thing I did today was to fit the rear number plate trim.  It's a chromed(?) plate that fits around the rear number plate carrier.  It's a bit distorted, I guess from the accident the car was in before I bought it, but I've managed to secure it in place using small self-tapping screws (see photo below):


The number plate trim is the "silver" rectangles seen inside the lights.
I had to remove the lights to fit the trim, as the lights help to keep the trim in place.

Now I have this trim in place, I can fit the carrier that I also bought from SNG.

So, continuing to make progress.  Still need to sort out the door locks and handles - I may try to get a locksmith to help me on this one - and the overriders and reversing lights on the back bumper, but I'm getting close to needing to get the sills replaced.  This is a good job to get someone to do for me over the winter, when I won't want to drive the car, anyway.  Hopefully that will allow me to get a Safety Certificate for the car, and I'll be able to take it out onto the highways come the Spring.  (Fingers crossed!!).

Tuesday 27 September 2016

Work During September - Bumpers, Exhaust & Cooling System

Wow, didn't realise it had been so long, or that I had done so much, since posting the last blog.

Bumpers
So, regarding the bumpers, I had been able to fit the original front bumpers and overriders, even though they are a little distorted, although not so much as you would really notice.  At the back, both original side bumpers are badly twisted, so won't go back in their current state.  I don't remember if I had mentioned in a previous post, but I bought a complete set of Series 3 bumpers off the internet. They were a good price, but unfortunately were from a Roadster, which I found out has a slightly differently shaped back end to the 2+2.  Having said that, I decided to fit the two side parts, which went on OK, since the bolt holes line up with the car.  However, the original centre piece has different fittings to the Roadster centre piece, so I haven't been able to fit that - it would have been ideal to fit as it has the correct fittings for mounting the overriders and the reversing lamps.  Anyway, I played around with the Roadster centre piece, and with a bit of filing, have been able to mount it between the two outside pieces.
Roadster rear bumpers fitted
It looks pretty good (if you don't get too close).  Now I need to make up brackets to mount the overriders and the reversing lights.

Exhaust
I'd been running the car with bits of an exhaust (not correct E-type parts) since I'd got the engine running - it was amazingly noisy - the kids didn't want to come near the car for fear of it blowing up!! - so I finally bit the bullet and ordered a stainless exhaust from SNG Barrett.  (Fortunately this was after the "Brexit" vote, so it was less expensive that when I'd priced it a few months ago due to the change in the GBP/$US exchange rate).

The new system arrived within about a week.  I then went out and bought a pair of ramps off Kijiji, which I used, along with a pair I am borrowing from Steve, to raise the car about 10ins off the floor so I could get at the exhaust system.

To my great surprise and relief, most of the parts of the exhaust came apart easily.  The only one I had a bit of trouble with was the sealing olive between the front and inter-pipes on one side.  It seemed to be stuck in the front pipe, which I haven't changed, but it finally came out with a bit of brute force (and fortunately no damage to the front pipe).  So once all that was off, I bought new s/s fasteners and got on with fitting the new system.

I got a bit confused with the orientation of the twin silencers, since the inlet and outlet stubs are both offset from centre, but after a few tries in different orientations under the car, I finally came to the correct positions.

I thought I'd need help installing the exhaust, but with strategic positioning of a pair of axle stands, I was able to support the weight of the various components while I fitted and tightened the clamps, so the whole thing went on in two sessions of a couple of hours each, including putting on the Quad Outlet Finisher ("whale tail").

Cooling System
While the car was raised, it presented a good opportunity to work on the cooling system.  The fans don't come on automatically, and the header tank was leaking.  I had also had the bottom hoses spray coolant out because the rubber hose wasn't sufficiently over a stub pipe for the clamp to grip properly, so I had had that great leak, and lost all the cooling fluid, shortly after I'd started running the car.

I'd bought a new coolant reservoir, so replacement of that didn't take much doing, and I replaced some metric fasteners that had been used previously with 1/4" UNC, which seem more appropriate for the car, seeing as all other fasteners are either UNF or UNC threads.

Under the car, after draining the system, I took off a couple of the bottom hoses and their stub connector pipe and re-fitted them, ensuring that there is now sufficient overlap of the hose on the pipe, so the clamps are well secure.

For the automatic running of the fans, I have bought a new thermostatic switch that should start the fans at the correct temperature - I'd assumed that the original on the car had failed.  However, when I actually got under the car to check it out properly, it turns out that there is no wire going to the switch, so it may actually still be working.
The Thermostatic switch that should bring in the radiator cooling fans (if it were connected).

Anyway, I decided I should replace it anyway, but I haven't been able to undo the bolts securing it into the pipe, so I've decided to leave it for now, and to continue to use the manual switch to run the fans all the time the engine is running. (Just need to remember to switch it off again!).

Getting the Car off the Ramps
Once I'd finished as much as I could do with the cooling system, I had to get the the car down off the ramps, then get the back end up on its own so I could get the rear silencer fitted.  I had originally got the car onto the ramps by raising, first the front end, then the back end using my hydraulic jack, then pushing the ramps under the wheels.  However, the rear silencer sits right below my jacking point, so once the silencer was fitted, I wouldn't be able to use that point.  So, before fitting the rear silencer, I used the jack to bring the car down off both sets of jacks, then raised the back again, using the jack, and pushed the ramps under the wheels.  I used the metal ramps, as they are about an inch higher than Steve's plastic ones.  That all went fine, and I installed the back box.

I'd positioned the ramps so I could roll the car down off them, leaving enough room at the front of the car (it was in the garage for all this work) for it to roll fully off the ramps well before getting near the work bench.  For this job, I had used the metal ramps that I'd bought recently.

Since I was getting ready to start the car for the first time with the new exhaust system on, Liz and the kids had come over with me to hear the new "quiet" car.  So, with the kids sitting in Liz's car watching a video, and Liz making sure I was lined up to come straight down the ramps, and not going to hit anything at the front, I got the car started, put it into gear, and slowly let off the brake to get the car onto the slope of the ramps before putting it in neutral to run down the rest.  But, before I could brake and put the car into neutral, I had dropped to the floor!!  With the lack of friction between the metal legs of the ramp and the concrete floor, the push of the tires on the ramp had pushed the ramps back, rather than pushing the car forward, so the rear wheels had come down the ramp, albeit a lot quicker than I had intended, but by the ramps moving relative to the car and the floor, rather than the car moving relative to ramps and floor.

One of the ramps ended up just in the entrance to the garage, but the other one had been pushed about 3 feet into the driveway.  Fortunately nobody had been anywhere near the back of the car - Liz was at the front, the kids were in Liz's car and there were no cars driving past - so there were no injuries and no damage.  However, I realise how very lucky I was - it could have been a lot more serious.

The car also came off with no adverse affects - I guess because it had gone down the slopes of the ramps, rather than falling vertically with no "vertical control", the stress on the suspension was minimised and wasn't affected.

This seems like a lot of work (and learning) since my last post, but there are other things I've also done on the car - rear hatch seal, accelerator pedal and windscreen washer hose, which I'll give more details about in the next post (which won't be as long in coming as this one was since the last!).

Friday 5 August 2016

Continued Progress

Again a long time between posts!

I've been getting to the car just about once a week.  Every time I go, I run it around the driveways and get it fully up to temperature.  Still haven't done anything with the exhaust, so still using the ramps to help back out of the garage, but I'm getting a lot more confident with it now.  Using the full choke to start from cold, and it takes a few turns before it fires, but once I've reversed the car from the garage, I can pretty much close the choke straight away.  I run the car round until it's up to temperature (which means that the gauge is reading right at the top at hot, but it hasn't "over-heated" yet - don't know if that's because I'm not running it for long enough, or if it's just where the gauge runs!.  I'm also keeping the fans running permanently with the manual switch, to ensure goos air flow across the radiator).  Once at temperature I stop the engine, and work on the car.

Once the brakes were sorted (I still need to get the warning light to go off, but I believe that will need me to bleed to the differential pressure switch between the two circuits, which I haven't got to yet),  I put back the rear seats, which I'd had to remove to get to the inboard rear brakes.  The back and the seat went in fine, but I struggled a bit with the seat belts.  The belts were only held at a single mounting point when I got the car, so I had to find all the correct bolts and mount them correctly.  I found a comment in a car forum on-line, that all seat belt mounting fittings are 7/16 UNF.  Steve had some spares, and with the ones I found with the car and his spares that he let me have, I got all four seat belts mounted correctly.  Unfortunately, the passenger-side one won't retract, so I'll have to replace that one, but the drivers side is working fine.  With the seat belts in, I was bale to work out where some of the trim fittings went in the car, so things are now looking quite good inside (and I've got a bit of space back on the shelves in the garage).

After the seat belts, I started to look at the door locks.  The keys won't turn in the barrels, so I've bought new barrels.  I started by taking the drivers door handle apart:
The parts of the drivers side door lock.
....and replaced the barrel in that one.  When I took the old barrel out, I found it was broken, so though I'd resolved it by just replacing the barrel.  However, although I can get the key to turn the new barrel, I can't work out how to keep the plunger extended when it's in the "open" position - I think I'm missing another part, but don't have one that came out with the original barrel.  The best way for me to see the "correct" set-up will be to take apart the passenger door handle.  I was reluctant to do this while that side was working OK.  However, now I've fitted new door seals, that one has stopped working properly aswell, so I'll take it apart soon to work out what's missing with the other one, and to replace its barrel.

I did try to find a locksmith that I could walk in to, to talk about the lock.  The only one I found to walk in to  wasn't interested in looking at an old automotive lock, and all the others that I've found on the internet, all seem to be mobile businesses now, with no home base to walk into - disappointing, but a sign of the times, I suppose.  I'll just have to call somebody out (at what $$ cost?) if I can't work it out from the passenger door lock.

Having been stumped for now with the door locks, I decided to go back to installing the seals that were missing.  I had bought a complete seal kit some months ago, so I went through that and found the ones that I needed.  I've now replaced the A-pillar, sill and frame seals on both doors, the main bonnet seal and the boot seal.  I need to see a car with the boot seal in place, because mine doesn't seem to be sitting properly.  (It's probably the wrong way round, but logically, it looks right!!).

Steve had a flat plastic tool that he lent me to help with seating the seals, but when he was away, I was struggling with a screwdriver to fit them, which wasn't working well.  Finally, in exasperation, I went to Canadian Tire, to see what they had on the shelf.  I found a nice little set of tools, designed for installing seals, which I bought, and which I found to work really well (photo below).
Seal Fitting Tools
There are two sets of these tools in the pack - the orange set is a softer plastic, and the black set is hard plastic.  I found the orange tool with the curved end was ideal for fitting the seals around the door frame, and used it continuously; the seal went in really quickly.  A good purchase!

Before fitting the seals, with Steve's help, I managed to install the two rear quarter lights.   I'd already worked out what fasteners I needed for the hinge plates (#8 UNF, I think), and once I'd got the countersunk version, we managed to get the hinge end in OK.  However, the tapped holes for the fasteners for the clasp at the back of the q-light were hidden behind the trim, with the trim not easy to get off.  However, I found some #6 UNF screws in the mess of parts that came with the car and, amazingly, they took up the thread with no problem.  A bit of luck, because it would have been a pain to have to work out what would fit in the hole, if I hadn't come across these.

That's the update for now.  I'll fill in on bumpers next time.


Tuesday 14 June 2016

First Outdoor Drive

It's been a long time since my last post, but that doesn't mean I haven't been doing anything on the car.  After the last one, I went back to the brakes and bled them properly.  Not surprisingly, I got a lot of air out all round, especially from the front right, but eventually eliminated air bubbles.  There was now a good feel to the brake pedal, so I felt it was time to let the car see the sunlight.

Before getting the car out, I needed to raise the exhaust.  When I bought it, the back section was separated from the car, and one of the resonators was missing.  The last owner didn't have the correct mounting brackets, so he had tried to hold the partial exhaust up in place with wire.  Unfortunately he had attached the wire to the heat insulator, which the exhaust's weight had pulled down.  So for this first run I managed to get the wire onto the actual brackets for supporting the exhaust and raise it far enough to give me decent clearance.  At the same time I put in my order with SNG Barrett for the correct exhaust hanger and rubber supports.

I managed to persuade Steve to forego his lunch break to spend time to see an historic event (!!), and my eldest son, Jamie, came along for the entertainment.

The car started no problem, and I let the temperature rise before moving it.  We put down two pairs of wooden planks to give me a ramp out of the garage to the driveway, and I put the car into drive.  Very tentatively I let my foot off the brake and let the car creep forward ............ and it crept!!

The car came down the ramp fine, my confidence in the brakes increasing continuously as they held the car with no feelings of sponginess whatsoever.  If the car had eyes, it would be blinking thousands of times per minute to get used to actual daylight after being inside in limited light for so long.

At the bottom of the ramp I turned the car to the left and actually drove my E-type Jag around my other car.  At this point I noticed that the temperature gauge was up at hot .......... then I noticed the steam coming from under the engine.  I pulled over and turned off the engine, fearing the worst - did I have a crack in the block?  See below for a brief video of this event, ending with torrential rain coming from the bottom of the engine.


Fortunately, it wasn't the worst case.  Actually it wasn't too bad at all.  One of the bottom hoses had not been pushed properly onto the stub connector, and the jubilee clip was just compressing the rubber hose. So with pressure and a bit of movement, the hose had pulled back and let the coolant escape.  The unfortunate part was that the hose was right at the bottom of the engine, and the coolant was very hot, almost steaming.  I ended up having to wait for the coolant to drain out before I could get to the hose.  I got it back over the stub pipe, and the jubilee clip tightened properly, so now it's secure again, although later I'll do a full adjustment of all the hoses.

To get the car back into the garage, I filled the system with water (after a long walk to the office toilet and back for enough water) and what little anti-freeze I had, and just drove it straight in.  Steve had had to leave as his lunchtime was over, but Jamie did a good job of guiding me back up the ramps and into the garage.

Keep checking back.  I've had the car out a couple of times again since this first one.  I'll update on those "adventures" soon.

Monday 16 May 2016

Car Moving Under its Own Power

I'll get back to the details of the brake work shortly, but suffice to say, for this post, that I've got the brake system back together and it works!!

So, having made sure that the hydraulic brakes as well as the handbrake will both hold the car stationary when trying to push manually, I tried putting it in gear.  It moves in both forward and reverse gears (it's automatic), and the brake holds it.  I need a lot of pressure on the brakes, but suspect that's because I haven't bled them with the engine running, so will need to remove some additional air in the slave cylinder when the servo is activated.

Due to a big drop off from the garage floor to the path outside, I didn't move the car outside of the garage, to avoid damaging the under-side (I'll get some wood to take up some of the drop), but even so I drove it forward about 6 feet, and reversed it the same distance.  Not far, I know, but after 15 months of working (intermittently) on the engine and the brakes, and understanding that the car hadn't run for 6-7 years before that, I'm ecstatic that it will actually run under its own power.

Now I just need to bleed the brakes with the engine running, then get it outside and see how it moves over distance.  WATCH THIS SPACE!!!!!!!!